Quickstart Guide
With easybits' Extractor, you can:
- Build independent reusable pipelines for each document type you want to extract data from.
- Define a data structure that fits your requirements.
- Upload PDFs or images to test your extraction pipeline.
- Integrate your automation pipelines into existing systems via API.
Before You Begin
Before getting started, make sure you have:
- One example document (in PDF, JPG, or PNG format) that you want to extract data from. For testing, you can also download our free example documents.
- A clear idea of which data points you want to extract (for example: client numbers, policy numbers, dates, or names).
Having these ready will help you get up and running with your first extraction in no time.
Step 1: Create a New Pipeline
Click the "Create a Pipeline" button in the top-right corner.

Step 2: Configure Your Pipeline Details
Provide the following information:
- Pipeline Name – A descriptive name to help you organize different pipelines (for example: Traffic Report Pipeline).
- Description – A short explanation of the document type you want to process (for example: Computer-generated traffic report form, completed with handwriting, detailing the traffic situation at the time of the accident).
- Upload a Sample File – Upload a sample document that represents the type of document you want to process with this pipeline.

Click "Map Fields" to move to the next step, defining which data points you want to extract from your sample document.
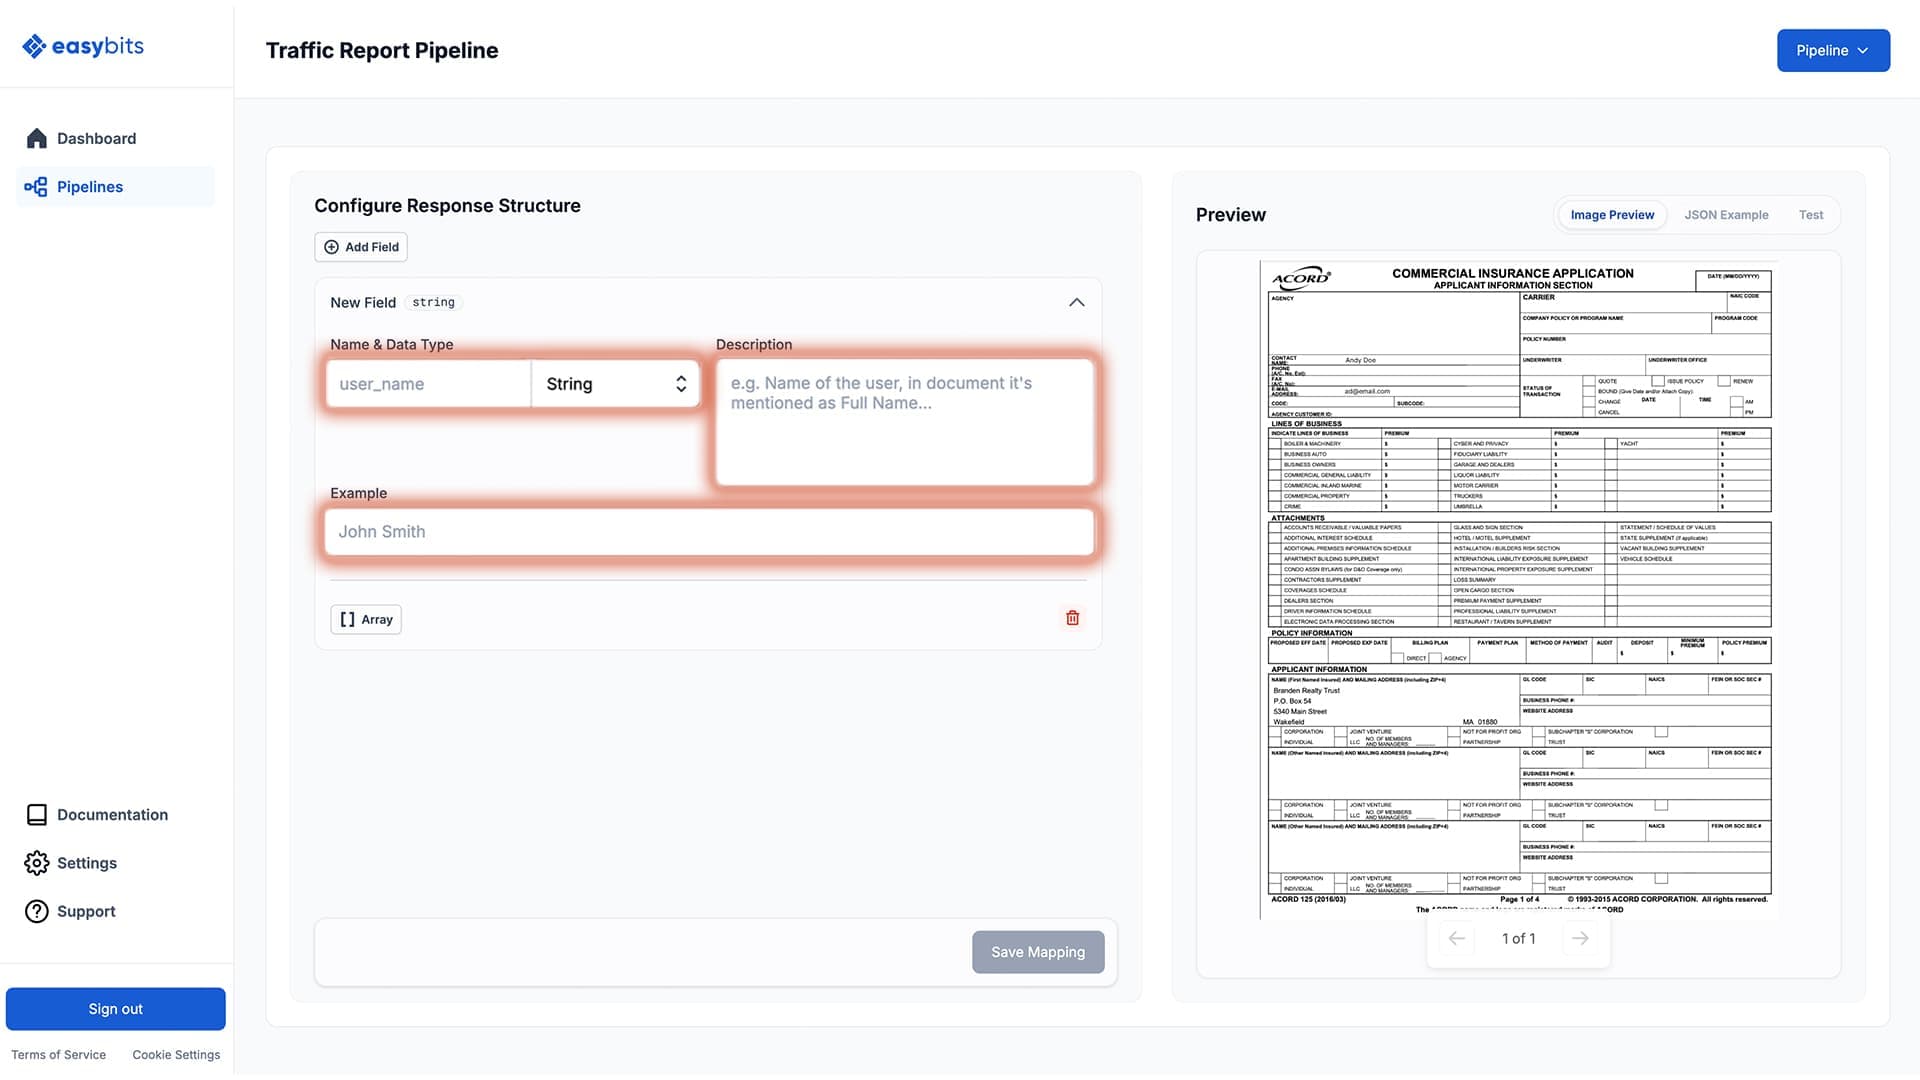
Step 3: Map the Fields to Be Extracted
Here, you can create an output structure, including nested objects / arrays, to match your desired output format.
For each field you want to extract from the document, specify:
- Field Name – This will be the key name in the JSON output.
- Data Type – Choose the data type for each field from the dropdown menu.
- Description – Briefly explain what data this field should capture (for example: Unique identification number of the customer).
- Example – Provide a sample value in the same format as the mapped field to guide the extraction.
Short Guide to Data Types:
- String – For names, dates, and other text-based fields.
- Number – For numeric-only fields.
- Object – To create a nested section that holds grouped fields (for example: Customer object containing name, birthdate, address, and total costs).
While specifying your desired output format, click the "JSON Example" tab in the top-right corner to see how your added fields will appear in the structured JSON output. This makes it easier to adjust your mapping and get the output format you need.
Skip the manual work with Auto-Mapping
Don't want to define every field by hand? Use our Auto-Mapping feature to let the Extractor analyze your sample document and generate the field structure automatically. You can then review and adjust the mapping as needed.
▶ Watch: Auto-Mapping Feature in easybits' Data Extraction Solution
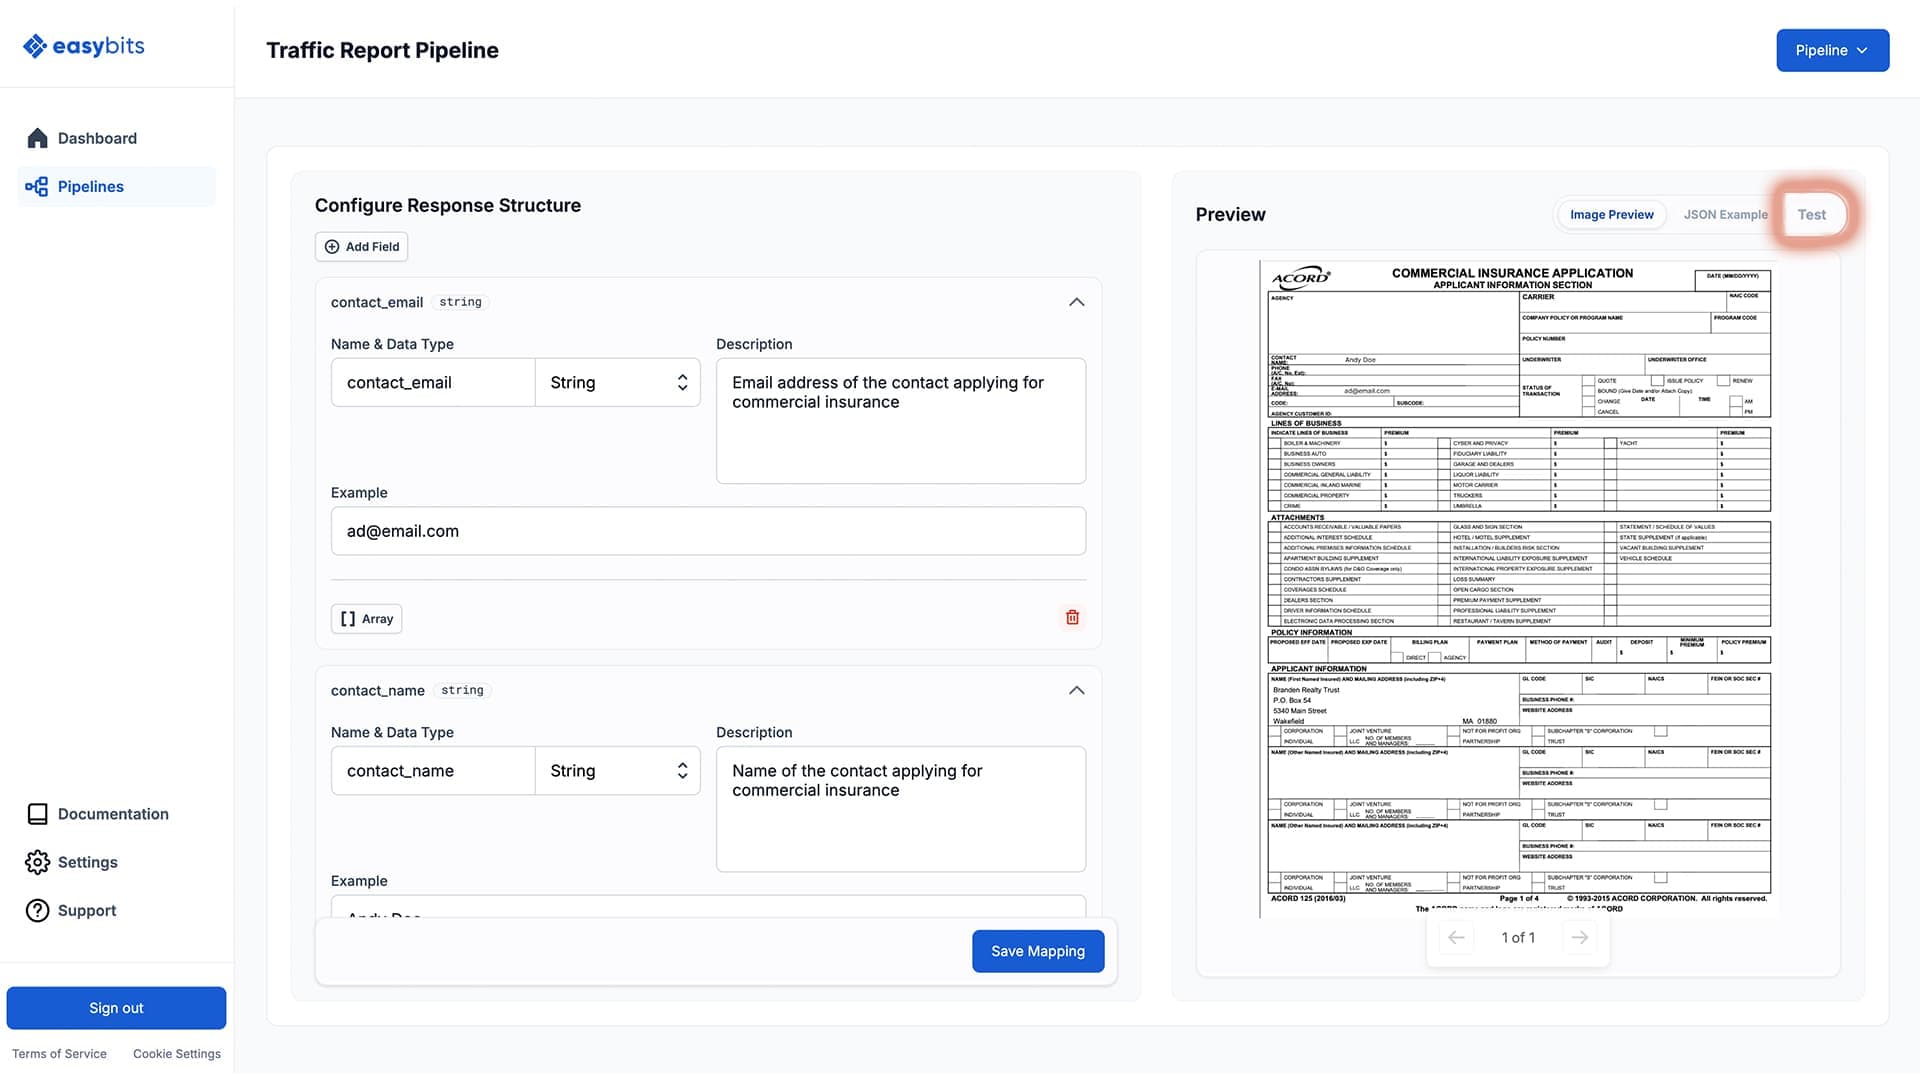
Step 4: Test Your Pipeline
Navigate to the "Test" tab in the top-right corner of the page. Click "Save & Test Pipeline" to run a test and preview the extracted fields in the defined JSON structure.
Review the extracted data and adjust your mapping as needed by editing the fields on the left side.
Step 5: Get Your API Credentials
Once your pipeline is configured, navigate to the Pipeline Details page. Click the "Pipeline" button in the top-right corner. Select "View Pipeline" to access your connection details:
- API URL – The endpoint where you'll send extraction requests.
- API Key – Your unique authentication token (keep this secure!)
If you need additional help with the integration process, visit our Integration section.

Tips for Power Users
Duplicate an existing pipeline
Once you've built a pipeline that works well, you can duplicate it as a starting point for similar document types — no need to rebuild from scratch. This is especially useful when you handle variations of the same document (e.g. invoices from different suppliers) or want to experiment with mapping changes without touching your production pipeline.
▶ Watch: Duplicate Pipeline Feature in easybits' Data Extraction Solution
Need Help?
If you encounter any issues or have questions, please visit the Support page to get in touch with our team.